Powered by Blogger.

Homemade Veggie Broth

Lately, I've been making a lot of recipes that include vegetable broth.

Instead of spending extra dough at the grocery store, I save a good buck or two by making it myself.

When you realize how simple it is, you'll probably want to make it too!

Even if you burn everything you touch, I promise that you will be able to make veggie broth.


The key is vegetable guts.

Okay, that's a little gross.

Maybe I should call it vegetable surplus.

It's the extra skin from the onion. The carrot top. The leafy part of the celery stalk. Get the drift?

Now, when I finish chopping up veggies, I stick the extra stuff in the freezer. When I'm ready to make some broth, I yank it out, and it's ready to help me make some veggie broth!


No recipe is needed, but here's the basic how-to:

1. Get a big 'ol pot and fill it half-full with veggies. You can use those last two carrots from the bag, the third of an onion you didn't use the last time you made meatloaf, the green stalks from green onions...etc. I have a few "staples" in my veggie combination. I have always included a green veggie (like spinach or broccoli), onions, and garlic.

2. Fill the pot with water until about 2/3rds full. This is approximately the amount of veggie broth that you'll end up. If you want a lot, use a big pot. If not, use a small pot. I feel like I'm becoming a poet over here! Add a dash (about 1 tsp) of salt. If you'd like, you can extra spices like basil or oregano.

3. Bring to a boil. Boil for about 5 minutes. Reduce heat and simmer for another hour or so (or until water starts to darken).

4. Place a large bowl under a colander/stainer. Drain veggies and broth--all the veggies will hang out in the strainer and the broth will end up in the big bowl!


5. Use it! I use what I need and freeze or refrigerate the excess.

That's it.

It's a simple way to use up extra veggies that are almost expiring or those darn carrot tops and extra onions. Plus, you save money doing it!

Read more...

Thanksgiving Recoup Soup


I don't know about you, but after Thanksgiving I feel like eating light for a few days. Even though I sneak cheeseball left-overs and pumpkin pie, I try and eat more nutritious meals. Try is the operative word.

When thinking about what to make with our left-over turkey, I thought that it would be nice to make a pot of hearty, yet not too heavy, soup.

I call it the recoup soup.

It all begins with onions, mushrooms, and garlic. Oh, and don't forget a little russet potato. I love the earthiness of the russet potato.

And then a little homemade veggie broth and a bit of milk.

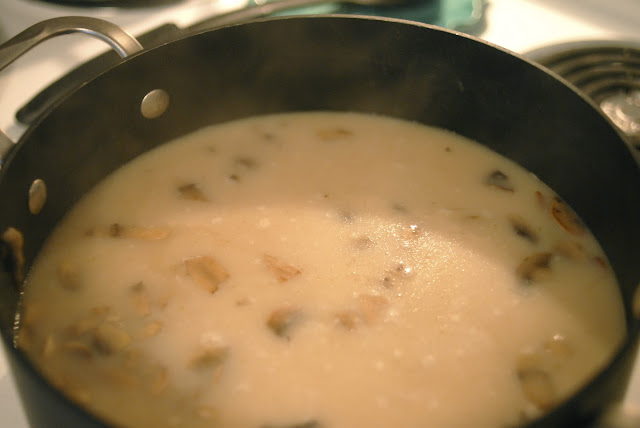
After it cooks up for a while (all the while smelling delightful!), it gets blended into a thick, tasty base. I, unfortunately, only have a small bullet-like blender, but an immersion blender would make this step a breeze. While blending about four small batches of the broth, I was seriously contemplating adding an immersion blender to my Christmas list.

Once it's all brothy and thick, I added more onion, mushrooms, pepper, zucchini, corn, potatoes, canned chilies, white navy beans, and about two cups of shredded turkey.


Let it simmer for about twenty or so more minutes. Add a dash of pepper and salt. Maybe add some cayenne if you want it a little spicy.

And gobble it down.

And then go take a nap. Because you can. Blame it on the turkey.

Thanksgiving Recoup Soup:
Serves 10-14
{Printable Recipe}

Ingredients:
6 cups of veggie or chicken broth
5 cups of white navy beans
2 cups of shredded turkey
1 medium onion (chopped)
1 bell pepper (chopped)
1 medium zucchini (chopped)
1 cup of milk
8 oz of mushrooms (about 2 cups chopped)
1 7oz can of chopped green chilies
1 15 oz. can of corn (drained)
2 garlic cloves (minced)
2 small or 1 large russet potato (about two cups chopped into 1/2 inch pieces)
1 tbsp of olive oil
Salt and pepper to taste

Directions:
1. Chop up onions, mushrooms, and garlic. Heat the oil in a large pot; cook onions, mushrooms, and garlic. Once onion is clear (about five minutes), remove half of the mixture from the pan and set aside.
2. Add a cup of chopped potatoes to the remaining mixture in the pot and cook for another five minutes.
3. Add broth. Bring to a boil, reduce heat, and simmer for about 15-20 minutes. Add milk.
4. Using a blender or an immersion blender, blend the broth until well blended and frothy.
5. Add the remaining cooked mushrooms, garlic, and onions. Then, toss in the chopped potatoes, beans, chopped bell pepper, turkey, corn, green chilies, chopped zucchini, and seasonings.
6. Bring to a boil, reduce heat, and simmer for an additional 15-20 minutes.
7. Add seasonings and eat!


Read more...

Roasted Sweet Potato with Baked Apples and Walnuts

Thanksgiving time is a wonderful time to stock up on sweet potatoes. In fact, our local grocery store is now selling sweet potatoes at just 22 cents a pound!

Like my previous two recipes, this recipe also includes apples. I simply love apples in the fall--and who can argue with soft and warm roasted apples? 
Plus, the smell of cooking apples and cinnamon is absolutely delightful!

I haven't quite decided if this recipe is breakfast, dessert, or just a warm afternoon snack. I ate it for breakfast, and it definitely hit the spot. Plus, I had extra roasted apples that are perfect for topping ice cream or oatmeal.

Tart, crisp apples are the key to savory roasted apples. They need a little extra crispness to keep them from getting too mushy while baking.

Cinnamon, a little brown sugar, walnuts, and a drizzle of olive oil give them just the punch they need.


Toss them on top of a roasted sweet potato, and you have a simple and delicious treat! 

Add a drizzle of plain or vanilla yogurt for a little extra fun!
Roasted Sweet Potato with Baked Apples and Walnuts:
Ingredients:
1 or 2 sweet potatoes
2 cups of diced apples
1/2 cup of walnuts
1 tbsp olive oil
1 tbsp lemon juice
1 tbsp brown sugar
1/2 tea cinnamon
Yogurt for garnish (optional, but recommended!)
Directions:
Pre-heat oven to 375 Fahrenheit. Peel, core, and dice apples. In a bowl, mix diced apples, walnuts, olive oil, lemon juice, brown sugar, and cinnamon. Place diced apples on a baking sheet. Half sweet potatoes lengthwise and poke holes into them. Place potatoes on the baking sheet with the apples. Bake apples for about 30 minutes (until soft). Remove apples and walnuts from the baking sheet. Continue to bake the sweet potato until soft (about 15-25 additional minutes). Once sweet potato is cooked through, remove from the oven. Spread warm apples over the sweet potato and garnish with yogurt or cinnamon.

Read more...

Cranberry and Apple Mini Pies

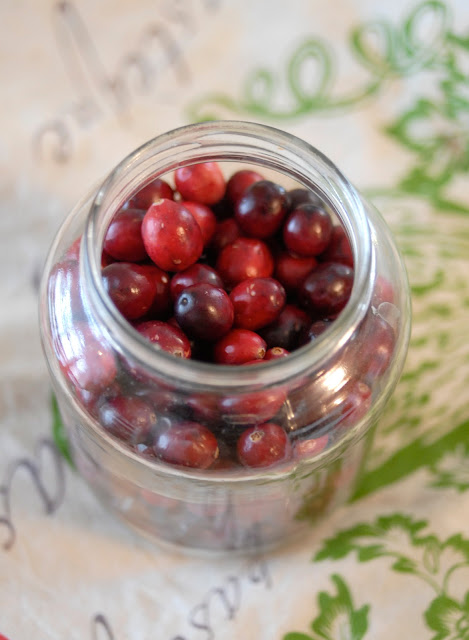
There's nothing like Thanksgiving time to remind me about how much I love cranberries.


And apples.
And pie.


I've been itching to try making some mini-pies for a while now and this gave me the opportunity to try it. 
Although this recipe takes a bit of time, it isn't very difficult. 


The filling of this pie is delectable! Cranberries, apples, sugar, cinnamon, and a little dash of ground cloves. In fact, I had a little extra so I piled it all in a pot, boiled it for a few minutes, and it turned into a lovely apple/cranberry sauce!

And the crust-buttery, flaky, and definitely NOT the healthy choice of the day. But let me tell you, while you are eating your mini-pie, you will not care. 


These little pies were so scrumptious that I had a hard time sticking to just eating one...

Cranberry Apple Mini Pies
Makes about 10 mini pies

Ingredients:

Crust (the crust was adapted from this recipe):

1 1/2 cup of all-purpose flour

1 1/2 cup of ground oats--blended to a flour-like consistency (can be substituted with all-purpose flour)

1 cup of chilled butter

1/2 tsp salt

1/2 cup of ice water
Filling:
1 pkg. of fresh cranberries (12 oz)
2 medium tart apples 
1/2 cup of sugar
1 tbsp lemon juice
1/2 tsp cinnamon 
Pinch of ground cloves
Directions:
Crust:
Blend 1 1/2 cups of whole oats into fine, flour-like consistency. Mix together flour, salt, and ground oats. Dice butter into small pieces and add them to the flour mixture. Cut in the butter until the dough is crumbly. Slowly (by tablespoon) add water, continuing to mix. Form dough into a ball and wrap with plastic. Refrigerate for at least two hours. 
Filling:
Dice cranberries (by halves or fourths). Peel, core, and dice apples into small pieces. In a medium bowl, mix apples, cranberries, sugar, lemon juice, cinnamon, and the pinch of ground cloves.
Mini-pies:
Preheat oven to 425 degrees Fahrenheit. Once dough is chilled, roll it out on a floured surface. Using a cookie cutter or glass, cut circles large enough to come to the top of the muffin pan cups. Press dough into the cups. Place approximately 1/3 cup of the mixture into each pie (make sure they are heaping since they will cook down!). Cut dough circles to cover the top of each mini-pie. Seal the top and bottom well. Cut slits on the top of each pie. Swipe the crusts with a little melted butter. Bake for 25-30 minutes. Let cool, remove carefully from muffin tin, enjoy!


Read more...

Slow Cooker Apple Pumpkin Butter

This recipe was one of my first recipes that I whipped up without a recipe handy. If you've been to my other blog, Home for Hire, you might have already seen it. In fact, I may be cheaping by basically copying and pasting my original recipe...okay, I am cheating.


But! The cool thing is that I learned how to make a printable recipes--so now, you can easily print the recipe!


Here's the original post (with a few little tweaks!):


After trying out a few recipes for Pumpkin Butter a few weeks ago, I went on a mission to write my own recipe for the stuff. I'm getting daring, people.

Daring + Apples + Pumpkin = Pure goodness. Like I couldn't stop licking the spatula goodness.


Guess what else?


It's easy!

Try it and tell me what you think! I wish I could invite you all over for some toasted bread and apple pumpkin butter. We could chat about how darn hot it still is in Texas. And you would pat my back and say, "It's okay, Nicole. Eat your apple pumpkin butter. You'll feel better!"


Crock Pot Apple Pumpkin Butter
{Printable Version}
Makes approximately 3 cups


Ingredients:
5 medium apples (approximately 2 lbs...I used Granny Smith)
1 tbsp of cinnamon
1/4 cup of brown sugar
2 tsp of pumpkin pie spice
1/4 tsp cloves
1 tsp vanilla
1 can (15oz) of pumpkin puree

Directions:
Peel, core, and chop apples into small pieces. Put chopped apples into crock pot with the remaining ingredients. Stir. Cook on high for at least six hours. If possible, stir occasionally. When apples are mushy, put the mixture into a blender and blend/pulse until smooth. Or, if you are like me, leave it a little chunky! You could probably keep it in the crock pot for longer, but I got impatient.

Put into airtight container and store in the fridge or freezer. Find excuses to spread it on bread or add it to your morning granola.


Easy. Delish. Fall bliss!


Read more...

Let's Meet Miss Kitchen

Although I generally like the look of our little townhouse/apartment, our kitchen (in my opinion!) is not the prettiest on the eyes.

I'm not sure about what to do with the streaky stained cabinets or the off white back splash. But what I dislike most about our kitchen is the fake butcher block. Oh, why, oh, why was that ever popular?

Here's what Miss Kitchen looks like most days (beware, I'm showing her in all her glory):


Yep. That's about right. No judging! 

I'll prettier her up someday and show her on a good day. I wanted you to see her real self first. 

Messy, chaotic, short on space, and trying to run from the 80's. 

Our ugly kitchen. My lab.


Read more...

Welcome to the Ugly Kitchen Experiment


A number of weeks ago, I exclaimed to my husband that my dream job would be making up recipes and spending the day in the kitchen. I told him that I thought it would be fun to have a blog all about it.
Today, I realized, that I should try it. I’m not going to quit my day job, but I am going to blog about my food experiments.
Why not?
My life has already had little surprises lately–why not throw in another one? You see, I already have a blog (homeforhireblog.com) about home, life, and my Etsy store. I’ve been sneaking in recipes here and there, but I really wanted to create a place just for my cooking experiments. Just about the kitchen.
Our ugly kitchen.


We are renters and sometimes kitchens from the eighties need a facelift. Ours is one of them.
Since I’m a strong believer in being content with what you have, I’m going to be thankful for the kitchen that I do have–fake butcher block and all.
I’m also not a professional anything, and I don’t claim to know much about food. I’m decently skilled at following recipes, but I want to do more than read a recipe. I want to adapt it. Change it. Make it up. Experiment.
If you are awesome in the kitchen, feel free to giggle at my “amateurity.”
One last thing, our food budget is pretty skinny. Expect simple, affordable, and healthy meals. Don’t expect gourmet.
I hope that you enjoy reading about the ugly kitchen experiment!

Read more...

LinkWithin

  © Blogger template Shush by Ourblogtemplates.com 2009

Back to TOP